Decorated glassware occupies an unusual position in the market. The same object might be a promotional gift, a hospitality tumbler, a retail candle vessel, or a cosmetic bottle, and in every case the buyer judges quality by a single question: does the design still look right after twenty washes? Most decoration failures are not artistic failures. They are adhesion failures, compatibility failures, or curing failures, and all three are predictable before a brush ever touches the piece.
You paint glassware by establishing a chemically clean, oil-free surface, applying a coating system chosen for the way the item will be washed and used, and then converting that coating from a dried film into a cured one through ambient crosslinking or a controlled bake cycle. Preparation determines whether the paint bonds at all, the coating system determines how the finished piece looks, and curing determines how long the decoration survives. Get all three right and the result is a genuinely durable product rather than a temporary decoration.
The sections below follow that sequence in the order a decorator actually encounters each decision, from understanding the substrate through to the tests that prove the work will hold.
Why Paint Behaves Differently on Glass
Glass gives paint almost nothing to grip. It is non-porous, chemically inert, and has a low surface energy, typically in the range of 30 to 40 mN/m when clean, which is below the threshold most coatings need to wet out and spread evenly. There is no grain, no fibre, and no microscopic texture for a film to key into, so adhesion depends almost entirely on interfacial chemistry rather than mechanical interlock.
On wood or metal, a coating can anchor itself in pores and scratches, which is why those substrates tolerate imperfect cleaning. Glass does not offer that forgiveness. A coating either wets the surface completely and bonds through polar interaction, or it sits on top as a weakly attached skin that lifts in sheets once water reaches the interface.
The contaminants that cause this are rarely visible. Four sources account for most adhesion problems:
- Mold release agents and forming lubricants left on newly manufactured ware, particularly on bottles and pressed items
- Sulfur-based cold end coatings applied during container production to reduce scuffing
- Sebum and salts transferred from fingers, which is why a single fingerprint can become a visible bare patch
- Detergent residue and hard water minerals from washing, which leave a film that blocks wetting
A practical field check is the water break test. Flood the surface with clean water and watch the film. If it retreats into beads within a few seconds, the surface is still contaminated. If it stays as a continuous sheet that drains evenly, the glass is ready. This test takes ten seconds and predicts adhesion more reliably than visual inspection.
The same constraint applies across product categories. Whether the blank is a stock item or part of a broader custom glassware program built to a specific mould, the surface chemistry is identical, and so is the preparation requirement.
Choosing the Right Paint for Glassware
Match the coating to the wash cycle and the food contact requirement first, and to the colour card last. Coatings for glass fall into four families that differ mainly in how they become durable: air-dry acrylics that rely on water evaporation and polymer coalescence, bake-cure organic enamels that crosslink at moderate heat, solvent and two-part systems that cure by chemical reaction, and ceramic frits that fuse into the glass surface itself at high temperature.
Air-Dry Acrylics and Craft Glass Paints
These are the most accessible option and the weakest in service. The film forms as water leaves and acrylic particles coalesce, which happens at room temperature and requires no equipment. The trade-off is that the film remains thermoplastic: it softens with heat, absorbs water slowly, and abrades under repeated washing. Air-dry acrylics are appropriate for decorative pieces that will be dusted rather than scrubbed.
Bake-Cure Organic Glass Enamels
These are water-based or solvent-based acrylic systems formulated with crosslinking chemistry that activates between roughly 150 and 200 °C. The bake step converts a soft film into a harder, more water-resistant one. This is the practical sweet spot for small-batch decorated drinkware: the equipment is a domestic or workshop oven, the colours are broad, and the resulting film withstands gentle hand washing well and light dishwasher exposure adequately.
Solvent-Based and Two-Part Systems
Solvent-borne coatings and catalysed two-part products deliver higher gloss and better chemical resistance without elevated heat. They are also the least forgiving: viscosity shifts as solvent flashes off, pot life limits working time, and ventilation becomes a genuine safety requirement rather than a preference. They suit volume work where spray equipment and extraction are already in place.
Ceramic Frit and Industrial Vitreous Enamel
The highest durability class does not work by adhesion at all. A ceramic frit is a finely milled glass powder pigmented with metal oxides, applied by screen printing, spraying, or decal transfer, then fired until the frit softens and merges with the substrate surface. In this process the decoration becomes part of the glass rather than a layer sitting on it, which is why the technique is described historically as enamelled or painted glass, a variant of the broader vitreous enamel family. Firing temperatures for glassware decoration sit in the 550 to 620 °C range, which is deliberately below the point at which the ware itself would deform.
| System | Cure condition | Film hardness | Dishwasher resistance | Food contact suitability | Typical use |
| Air-dry acrylic | Ambient, 24 hours to handle | Low | Poor | Not recommended near food | Display and gift pieces |
| Bake-cure organic enamel | 150 to 175 °C, 30 minutes | Medium to high | Moderate | Rim clearance required | Small-batch drinkware |
| Solvent or two-part | Ambient or 60 to 80 °C | High | Good | Rim clearance required | Sprayed volume work |
| Ceramic frit | 550 to 620 °C fusion | Very high | Excellent | Certified formulations available | Production and export programs |
Preparing Glassware Before Painting
Preparation has four stages: alkaline washing to remove organic soiling, thorough rinsing to eliminate detergent residue, solvent wiping to strip the last film of oil, and handling discipline so the cleaned surface is never touched again. Skipping the solvent step is the single most common cause of a decoration that looks perfect on day one and peels within a month.
Warm water with a mild alkaline detergent removes dust, grease, and handling oils. Rinse in clean running water rather than a standing bath, because a static rinse simply redistributes surfactant across the surface. Dry with a lint-free cloth or allow to air dry in a dust-free area. Hard water leaves mineral spotting that interferes with wetting, so a final rinse with deionised water is worth the small cost wherever it is available.
Then wipe the intended decoration area with isopropyl alcohol or a comparable solvent on a lint-free cloth, and allow a full fifteen minutes for it to flash off completely. Solvent trapped under a coating becomes a bubble at the worst possible moment.
Abrasion is optional and frequently misunderstood. Light scuffing with fine abrasive paper raises surface energy and improves grip, but it also introduces permanent haze, so it should be confined to areas that will be fully covered by opaque paint. Never abrade a surface that will remain visible.
Masking follows the same logic. Low-tack tape and removable stencils define crisp edges, but the tape edge must be burnished down firmly, and on curved surfaces it should be cut into short segments rather than stretched around the curve.
Finally, handling. Once cleaned, the piece should be held by the base, the foot, or the inside of the neck. Nitrile gloves remove the variable entirely.
Surface Preparation at Production Scale
Hand wiping does not scale. Production lines use a tunnel washer with alkaline wash, rinse, and deionised final rinse stages, followed by flame or atmospheric plasma treatment immediately before coating. Both methods oxidise the surface and raise surface energy well above the wetting threshold. The critical control point is the interval between treatment and coating: treated glass recontaminates within hours, so the two operations must be in line, not separated by a storage step.
How to Paint Glassware Step by Step
The working sequence is clean, degrease, mask, lay out the design, outline, fill in thin layers, allow full solvent release, then cure and cool. The two steps people rush are the ones that decide the outcome: the waiting before the first colour goes on, and the cooling after the bake ends.
- Wash the piece in warm alkaline water, rinse thoroughly, and dry completely.
- Wipe the decoration zone with isopropyl alcohol and let it flash off for fifteen minutes.
- Apply masking tape or stencil film, burnishing every edge.
- Position the design. For curved ware, tape the paper reference inside the glass and trace from outside.
- Draw outlines with a relief liner and let them dry fully, several hours or overnight, before filling.
- Apply colour in thin, even coats rather than one heavy pass.
- Allow each coat to dry to the touch before the next, and expect two or three coats for solid coverage.
- Remove masking tape while the film is still slightly soft, so the edges release cleanly instead of tearing.
- Let the finished piece stand for at least 24 hours before any heat is applied.
- Cure according to the product instructions, then cool slowly and completely before handling.
Brush discipline matters more than brush quality. Work in one direction, reload before the bristles drag, and avoid reworking a wet area, because each pass pulls pigment out of the film and leaves a thin, streaky patch.
Reverse painting deserves a mention because it solves the food contact problem elegantly. The design is applied to the outside of the vessel and viewed through the glass from the inside, or applied to the inside of a flat piece and viewed from the front. Either way, the decorative layer never touches the contents.
How to Paint Glassware with Acrylic Paint
Ordinary artist acrylic is the wrong product for glassware, but dedicated glass and multi-surface acrylics work well within clear limits. The distinction is formulation: glass-rated acrylics contain adhesion promoters and softer, more flexible binders that wet out a low-energy surface, while standard acrylics bead up, dry brittle, and lift once moisture reaches the interface.
Application follows the same thin-layer logic. Two or three translucent coats bond better than one opaque coat, because a thick film skins over while solvent remains trapped underneath, and that trapped solvent becomes the failure point later. Recoat intervals of one to two hours are typical, but the film is not durable at that stage, only dry.
The question of sealing is where expectations need managing. A clear topcoat raises water resistance and abrasion resistance, and it can make a decorative piece survive occasional hand washing. It does not convert acrylic into a fired enamel. Sealants also change the surface, adding gloss or a slight texture, and some yellow over time. For a decorative object that will be handled occasionally, sealing is a sensible step. For drinkware in daily rotation, the honest answer is that acrylic belongs on the outside, well below the rim, and the piece should be hand washed.
The full working method, including coat timing and edge control on curved surfaces, is covered in the guide to paint glassware with acrylics.

How to Make Glass Paint Permanent
Permanence on glass is not a single state. It is a ladder with three rungs: resistant to hand washing, resistant to repeated dishwasher cycles, and fused into the substrate. Reaching the second rung requires a complete bake cycle with a slow ramp up and a slow cool down, and reaching the third requires ceramic frit fired near the softening point of the glass itself.
The mechanics of the bake are simple and the failure modes are not. The piece must enter a cold oven, because placing cool glass into a hot chamber creates a temperature differential across the wall, and that differential produces the classic radiating crack. The oven then ramps gradually to the target temperature, holds, and is switched off with the ware still inside so that cooling happens at the same controlled rate. Opening the door early to check progress is how most bakes end in fragments.
| System | Target temperature | Hold time | After the bake |
| Bake-cure organic enamel | 150 to 175 °C | 30 minutes | Cool in the closed oven, then rest 72 hours |
| Solvent two-part | 60 to 80 °C or ambient | 15 to 30 minutes | Full chemical resistance after 7 days |
| Ceramic frit | 550 to 620 °C | 3 to 8 minutes at peak | Controlled annealing cycle |
Glass type sets the ceiling on all of this. Soda-lime glass, which covers the large majority of drinkware and containers, tolerates a wall-to-wall differential of roughly 40 to 50 °C before the stress exceeds its strength. Borosilicate glass, with a coefficient of expansion near 3.3 against roughly 9.0 for soda-lime, tolerates far more and is correspondingly more forgiving in any heat process. Where the application involves hot filling, thermal cycling, or oven use, specifying borosilicate glassware at the design stage removes most of the risk before decoration begins.
Two further constraints are absolute. Frit firing windows are narrow and specific to the substrate, because the aim is to soften the decoration without deforming the ware, and the margin between those two events is small. And a baked organic film is not the same as a fired inorganic one: it will survive washing, but it will not survive a 500 °C firing cycle, an abrasive scouring pad, or prolonged solvent contact.
Paint for Glass Windows
Paint for glass windows is a different problem from paint for glassware, because the surface is large, vertical, exposed to ultraviolet light and condensation, and often expected to be removable. Coatings for windows need exterior-grade UV stability, strong adhesion across a large unsupported span, and a primer strategy matched to whether the glass is bare or coated.
The first check is the glass itself. Coated products, including low-emissivity and solar control glass, carry a thin metallic or oxide layer on one face. Paint applied to that face will not bond reliably, and aggressive cleaning may damage the coating. Identify which face is coated before any preparation begins, and work on the uncoated face only.
For a durable exterior finish, the sequence runs: degrease with an alkaline cleaner, rinse and dry, lightly abrade to raise surface energy, remove dust, apply a bonding primer formulated for glass, then build the topcoat in two thin layers. Full cure typically takes several days, during which the surface should not be washed or exposed to rain.
Removability is often the actual requirement. Seasonal window decoration is better served by a peelable water-based system than by a durable one, because scraping cured paint off large panes is slow, risks scratching, and consumes more labour than the original application. Where removal is anticipated, choose the coating for reversibility first and appearance second.
Applying Paint to Different Glassware Types
The coating system is only half the decision. The geometry of the item dictates where paint may go, and several common forms have hard exclusion zones where decoration creates a functional or safety problem.
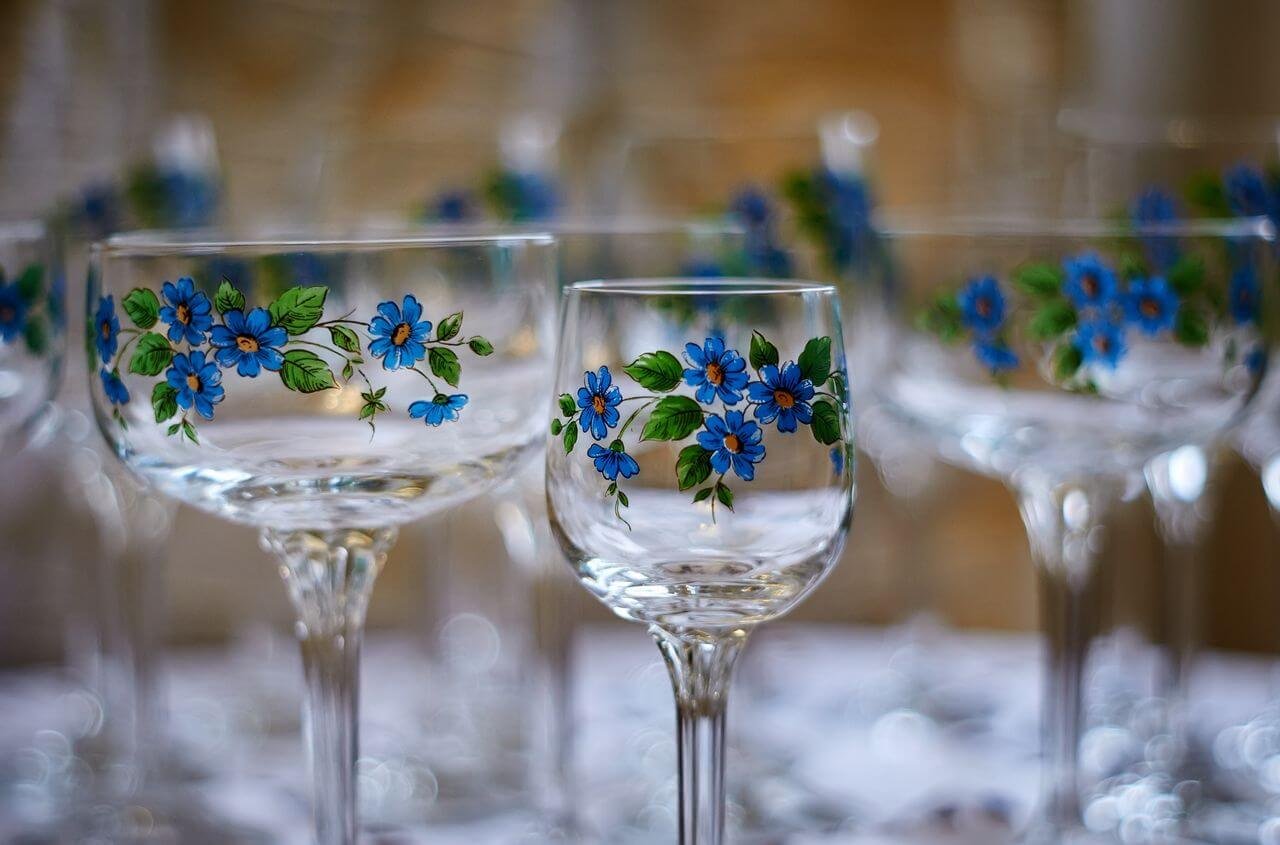
Wine Glasses and Stemware
The rim contact zone is off limits. Standard practice defines the area within roughly 20 mm of the lip as a food and drink contact surface, and any coating there will be exposed to wine, saliva, and repeated washing. Decoration belongs on the bowl below that line and, for special pieces, on the foot. The stem is a stress concentration point and a flexure point, so heavy or brittle films there crack and flake; thin applications on clear or tinted glass hold up better.
Mason Jars and Bottles
Threads, sealing shoulders, and lid seats must remain bare glass. A film of paint on a screw thread alters the fit, reduces gasket compression, and turns an airtight container into a leaking one. On bottles, the same applies to the bore and the sealing bead at the mouth. Decoration on the body is straightforward; decoration near any closure interface is not. Where jars are the intended blank, the specific handling rules for threaded openings are set out in the guide to paint mason jars.
Perfume Bottles and Cosmetic Glass
Cosmetic packaging places the highest premium on optical clarity and surface perfection. Spray application with a masked clear window is the usual approach, giving an opaque body with a transparent band that reveals fill level. Because these items are rarely washed, adhesion demands are lower, but resistance to alcohol-based contents and to handling oils is higher, which pushes the specification toward solvent systems or frit.
Food Safety, Durability Testing, and Compliance
Any decorated item that will contact food or drink must keep the coating out of the contact zone entirely, and must demonstrate that the decoration does not release heavy metals above regulated limits. The practical rules are a bare rim, a bare interior, and a documented extraction test result.
The industry reference for glass hollowware is the ISO 7086 series, which specifies both the test method and the permissible limits for lead and cadmium release. Testing uses a 4 percent acetic acid solution at 22 °C for 24 hours across four specimens, and the limits scale with capacity.
| Category | Capacity | Lead limit | Cadmium limit |
| Small hollowware | Under 600 ml | 1.5 mg/L | 0.5 mg/L |
| Large hollowware | 600 ml to 3 L | 0.75 mg/L | 0.25 mg/L |
| Storage hollowware | 3 L and above | 0.5 mg/L | 0.25 mg/L |
The standards distinguish the rim area in contact with lips, defined as a 20 mm band, and apply separate limits there, which is the technical basis for the bare-rim rule. Note that these standards are under periodic revision, with limits trending stricter, so specifications should reference the current edition rather than a remembered figure. The industry guidance on food contact conformity testing sets out the test methods and evaluation logic in detail.
Durability is verified separately. A cross-hatch adhesion test cuts a lattice through the film and pulls tape across it to assess how much coating lifts. Repeated washing tests subject the item to a defined number of dishwasher cycles and then re-check adhesion, gloss, and colour. Both are worth running on a first production batch rather than discovering the result in a customer complaint.
This is also the point where hand decoration stops being viable. Consistency of film thickness, cure temperature, and contaminant control all drift when a process depends on individual technique, and the compliance documentation that export buyers require cannot be built on drift. Moving to industrial decoration, whether through in-house equipment or a partner offering comprehensive painting services, is what makes the specification repeatable at volume.
Troubleshooting Common Glass Painting Problems
Nearly every glass painting defect traces back to one of four variables: contamination on the surface, film thickness, solvent retention, or thermal shock. Identifying which variable is at fault is faster than adjusting the technique at random.
| Symptom | Likely cause | Correction |
| Peeling in sheets after washing | Oil, silicone, or release agent left on the surface | Solvent wipe until the water break test passes, then recoat from bare glass |
| Bubbles or pinholes in the film | Solvent trapped under a thick coat, or dust on the surface | Thinner coats, longer flash-off, filtered paint, clean enclosure |
| Sagging, runs, or pooling | Over-thinned product or a single heavy pass | Two thin coats, rotate the work while drying |
| Cloudy or hazy appearance | Abrasion outside the painted area, or hard water rinse | Confine sanding, final rinse with deionised water |
| Streaky, uneven colour | Reworking a wet film with the brush | Single-direction passes, allow the film to level |
| Cracks radiating after baking | Preheated oven, or cooling with the door open | Cold oven start, cool completely inside the closed oven |
| Fading or chalking outdoors | Organic pigment without UV stabilisation | Switch to an exterior-grade pigmented system or frit |
FAQ
Does painted glassware fade in direct sunlight?
Organic coatings degrade under ultraviolet exposure, and the rate depends on pigment chemistry and whether the formulation includes UV absorbers. Indoor pieces near a window are generally fine for years, while pieces displayed outdoors or on a sunlit sill will shift over time. Ceramic frit decoration, being mineral rather than polymer, is the only option that holds colour outdoors over decades.
Can cured glass paint be removed and the item repainted?
Baked organic films can usually be softened with a solvent such as acetone or a commercial paint stripper, then lifted with a plastic scraper, though the effort scales with how well the original bake was executed. Fired ceramic frit cannot be removed chemically at all; it is part of the glass surface and only mechanical abrasion or hydrofluoric acid etching will touch it. This asymmetry is worth remembering when specifying decoration for a product that may need to be reworked.
What does factory decoration require compared with painting at home?
Industrial decoration adds artwork separation and colour matching, screen or pad printing tooling, kiln scheduling, and batch testing for adhesion and heavy metal release. Minimum quantities are driven by tooling amortisation rather than by paint cost, so short runs are usually more economical with digital transfer or decal methods, while repeat volume programs justify screen tooling. Lead time is governed mainly by kiln capacity and the annealing cycle, not by printing speed.