
1. Why Vacuum Sealing in Mason Jars Works
Mason jars are the cornerstone of food preservation, beloved for their durability and airtight sealing capabilities. These versatile glass containers can keep food fresh for months when properly sealed. But did you know there’s more than one way to how to seal mason jars?
By understanding how to vacuum seal food in mason jars, you can extend shelf life significantly. The process removes oxygen, which slows bacterial growth and prevents spoilage. This works for everything from bulk spices to weekly meal prep salads.
Whether you have mason jars 4oz for jams or larger quart sizes for flour, the principles remain similar. A proper vacuum seal creates that satisfying “pop” when opened—music to any home preserver’s ears.
Stock Up on Quality Glass Jars at Holin Glass
2. Method 1: Using a Vacuum Sealer for Mason Jars
Choosing the Best Mason Jar Vacuum Sealer
The most efficient approach is using a dedicated device. The best mason jar vacuum sealer options include electric handheld models and attachment kits compatible with larger machines.
Electric models have gained popularity recently. One Kickstarter project called AutoVac claims to seal jars in just 9 seconds with an automatic pressurization system. Meanwhile, the Love Moment Electric Mason Jar Vacuum Sealer Kit has been selling over 10,000 units monthly on Amazon with an impressive 4.8/5 star rating.
Step-by-Step Process
- Fill your jar – Add food while leaving at least 1 inch of headspace at the top. This prevents ingredients from being sucked into the sealer.
- Place the lid – Use the flat metal lid (disc) on the jar. Don’t screw on the ring just yet if using a standard vacuum sealer attachment.
- Attach the sealer – Position your vacuum sealer for mason jars over the lid. For FoodSaver systems, place the jar sealer attachment on top and push down firmly.
- Start the machine – Most devices automatically stop once the vacuum is complete. You’ll often hear the lid “pop” as it seals.
- Screw on the ring – Once sealed, remove the attachment and tighten the metal screw band.
What Users Say
Reviews highlight the practicality: one user mentioned preparing salads for the entire week with the mason jar vacuum sealer, keeping lettuce crisp significantly longer. Dry goods like spices and nuts also seal excellently—the lids are sucked down so tightly that a can opener is sometimes needed to remove them.

3. Method 2: How to Vacuum Seal a Jar Without a Vacuum Sealer
No vacuum sealer? No problem. Traditional water bath canning is still one of the most reliable methods for how to vacuum seal glass jars at home.
How to Vacuum Seal a Mason Jar with Boiling Water
This classic technique creates a vacuum through heat and pressure changes. Here’s the process:
| Step | Action |
|---|---|
| 1 | Sterilize jars by boiling for 10 minutes |
| 2 | Fill with hot preserve/food, leaving headspace |
| 3 | Wipe rims clean, place lids, screw bands fingertip-tight |
| 4 | Submerge in boiling water (1–2 inches over lids) |
| 5 | Process for recommended time (10–15 minutes typical) |
| 6 | Cool undisturbed for 12–24 hours |
During cooling, you’ll hear that satisfying “ping” as lids seal. Test by pressing the center—if it doesn’t flex, it’s sealed.
How to Seal Glass Jars at Home With the Inversion Method
An even simpler approach exists for hot preserves:
- Fill jar with hot jam or chutney
- Secure the lid with gloves
- Turn the jar upside down on a dish towel for 5–15 minutes
- Flip it right-side up and cool
While quick and easy, this creates a weaker seal than water bath canning. It’s not recommended for low-acid foods.

4. Best Foods for Vacuum Sealing Food in Jars
Not everything belongs in a sealed jar. Here’s what works well:
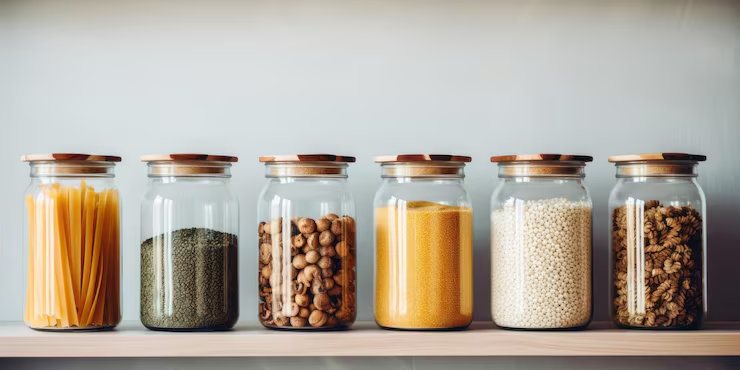
Dry Goods
- Flour, sugar, and baking ingredients
- Coffee beans and grounds
- Rice, pasta, and beans
- Nuts and dried fruits
- Pet food
Wet and Perishable Items
- How to seal mason jars for pickling – cucumbers, onions, and vegetables
- Sauces and salsas (must be properly processed)
- Meal prep salads (stay crisp for 7+ days with a vacuum sealer)
- Fruits and vegetables
Creative Options
- How to seal a mason jar with dry ingredients for gifting is particularly popular. Chalk labels make these jars perfect for pantry organization or homemade gift sets.
5. Common Mistakes to Avoid
| Mistake | Why It Matters |
|---|---|
| Overfilling the jar | No headspace means ingredients block the seal |
| Using old lids | Sealing compound loses effectiveness |
| Not checking for cracks | Compromised jars won't seal properly |
| Screwing bands too tight | Can prevent air escape during water bath processing |
| Not removing air bubbles | Trapped air interferes with the vacuum |
When learning how to vacuum seal a jar without a vacuum sealer, cleanliness is paramount. Always inspect jars for nicks or cracks before starting.
6. Final Thoughts
Mason jars remain incredibly versatile for food storage. Whether using a modern electric device or traditional canning methods, mastering how to vacuum seal food in mason jars saves money and reduces waste.
For bulk purchases, mason jars Costco offers excellent value. Beyond food storage, mason jars for flowers and mason jars crafts show their versatility extends well beyond the pantry.
If you’re looking for custom options, explore Custom Glassware for your storage needs. With the right technique, those Glass Jars will keep your food fresher for longer—and that’s a win for any kitchen.

7. Common Questions About Mason Jar
Yes, but with precautions. Use the water bath method for high-acid liquids like juices or vinegar-based sauces. With electric vacuum sealers, avoid overfilling and consider freezing first to prevent suction of liquids into the machine.
For jars sealed with an electric vacuum sealer, the lid is often extremely tight—some users report needing a can opener to pry it off. For water-bath sealed jars, gently pry the edge with a spoon to break the vacuum seal.
Shelf life depends on the food. Dry goods can last 1–2 years when properly sealed. Canned acidic foods typically last 12–18 months. Always check seals before consuming and discard any jars where the lid moves or shows signs of spoilage.
Technically yes, but not recommended for long-term storage. The sealing compound compresses during initial use, making the second seal less reliable. Use new lids for water bath canning or anything stored beyond a few weeks. Screw bands can be reused indefinitely—just keep them clean and rust-free.
No. Low-acid vegetables, meats, and seafood require pressure canning to prevent botulism risk. High-acid foods like fruits, jams, and pickles are safe for water bath canning. Dry goods like flour, rice, and beans work wonderfully with vacuum sealing. When in doubt, check USDA guidelines or refrigerate instead.
Vacuum sealing removes oxygen to slow spoilage—great for dry goods and extending fridge life. Canning uses heat processing to kill bacteria, creating shelf-stable food that doesn’t need refrigeration. Vacuum sealing doesn’t sterilize; it merely creates an anaerobic environment. Use canning for long-term preservation and vacuum sealing for pantry staples or prepped ingredients.


